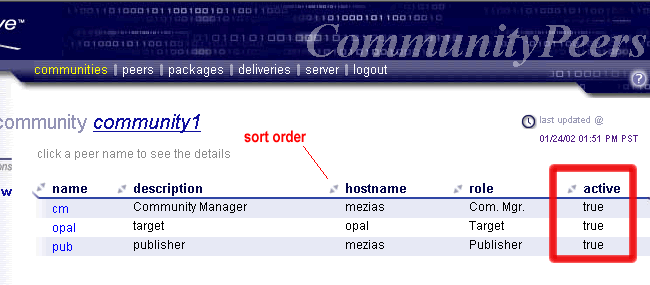

This page holds instructions to continue to demonstrate the Everweb application with instructions for Step four, mentioned on the previous page. Begin by clicking on the communities item in the menu bar and selecting community1 from the list that is presented on the page. Click on the peers link (top-left) to display a window containing community details similar to the window below:
Note that the triangles at the top of each column allow you to set the sort order (ascending or descending) of each column. This page displays all of the parameters of the create peer and add peer commands. In addition, there is a column with information on whether or not a peer has joined. The "active" column is set to true for all peers in community1. If you look at the same output for community2 you should see "false" in the "active" column next to the target peer as it has not yet gotten a copy of the seed file and joined the community.
Now that you have verified the connectivity of the peers of this community you are ready to execute a delivery from the Everweb application. First, select the packages item from the menu. Then click on the SimpleTest.xml link. The application now displays the contents of the package.
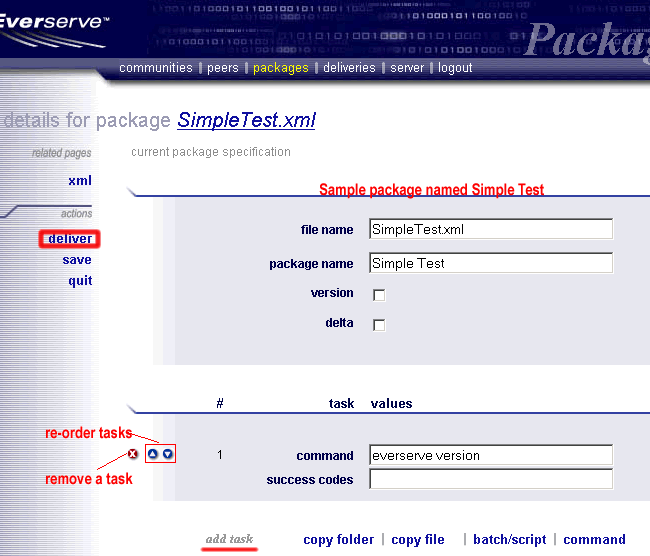
This picture of the Package Editor screen highlights some of the features you can use to create your own packages. At this point, don't change anything. Just click the link for the deliver command which will traverse to the Delivery pages. The dropdown lists of the New Delivery page are shown here.
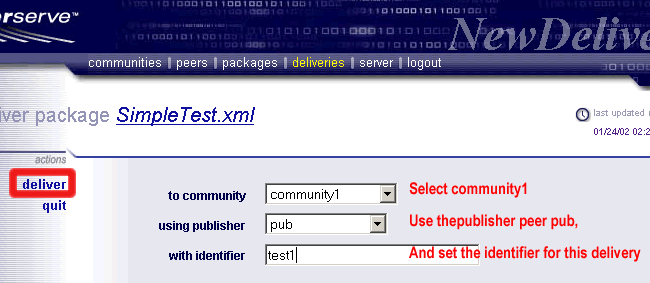
Now select community1 from the Community dropdown list and pub from the Publisher dropdown list. You can use the default identifier "delivery1" or type in one of your own. Finish executing the command by pressing the deliver link which takes you to the Deliveries Page (as if you had clicked on the deliveries menu item).
The Deliveries page allows you to send another package when you choose the create new link. For now you will navigate this page to view the receipts for the package that was just delivered. Click on the blue link in the identifier column. This is the top level receipt entry and the value in the id column corresponds to the valaue typed into the identifier field before clicking the deliver link. Continue to navigate to the Receipt Details by clicking on the target's peername listed in the rightmost column.
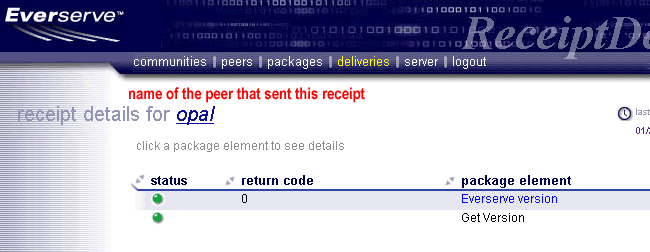
Each task or specification of the xml package file is now spelled out. Select the Everserve version package element in order to view the standard error and standard output from execution of the package's "Everserve version" command-spec on the target system.
Now you are free to execute another delivery of the same package or return to the Package Editor page to define something new. You can navigate through all of the web application pages and intuitively work with all of the Everserve commands. You are ready to use Everserve communities to manage all of your remote administration tasks. Read the System Administrator's Guide and check out the "samples and examples" pages for more information and uses of Everserve.